As I perused the aisle of Valentine cards at the pharmacy earlier this week, I kept hearing the little voice inside my head that told me to go home, put my crafting hat on and save the $4.75 (so thrifty, I know). And when I sat down to create these easy little cards for V-day and beyond, I was reminded of the old days (way back in the 90s) when I would get out the glitter and markers to make cards for my classmates. This quick craft is decidedly updated and a touch more sophisticated now that we are well into the new millennium. You can employ this method any time of year for birthdays, thank yous, weddings, you name it. Read on to get started…

You’ll need:
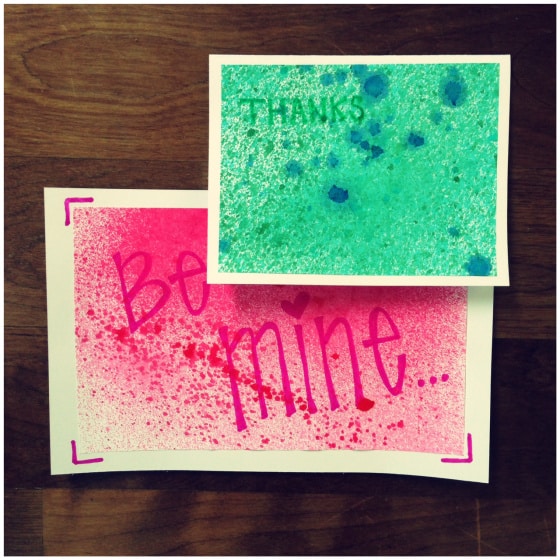
1. One set of plain note cards and envelopes // 2. A few colors of spray dye (you can also use watercolor paints) // 3. Several plain sheets of high quality paper or light card stock // 4. Glue // 5. Scissors // 6. One small piece of card stock cut into two ‘L’ shapes // 7. Markers (optional)

What now?:
– Cover a couple of your plain pieces of paper or card stock with generous layers of spray dye or paint (as shown above). Get creative and abstract – no rules here!
– Take your two ‘L’ shapes and frame up a few sections of each painted page (as shown below). Try rotating the page to find and frame different areas of the painting. When you’ve found a section you like, trace around the edge of each frame.
– Cut along the traced edges, making sure your framed piece lines up with your plain notecard.
– Glue painted sheet down on the front of the notecard, being careful to secure it well along the edges (you can leave a slight white border around the painted sheet, or cut it to fit the notecard size exactly).
– Use markers to add a message or border details.


