Last week I was lucky enough to spend a sunny, crafty little afternoon with one of my fave bloggers (and all round super stylish New York gal), Quinn Cooper. We kicked it old school in my backyard with a little dip dye action, so very reminiscent of my summer camp days. Fun fact: I was head of arts & crafts!
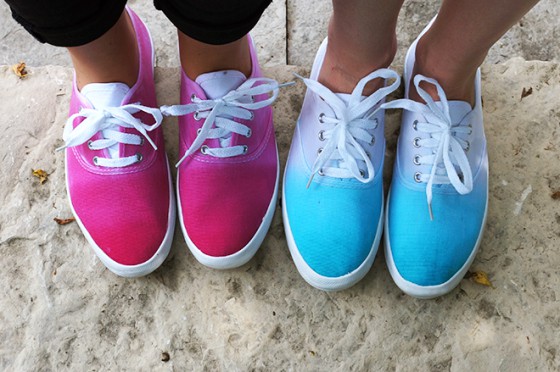
Quinn and I selected some of our favourite colours and got to work dip dying these plain white sneakers and giving them a really fun ombré effect. We also made some two-tone tea towels that came out beautifully…if we do say so ourselves. The dip dyed shoes were such a fun activity. Check out the image and steps below if you want to make them yourself. And make sure to check out Quinn’s blog for instructions on our DIY Tie Die Dish Towels!

You’ll need:
– a pair of plain white sneakers (Keds or similar)
– fabric dye in your desired colour
– Vaseline
– rubber gloves
– an old cloth or rag
– a bucket or tub to mix the dye
– salt
– a stir stick

Step One: Prepare your work space
Make sure to set up shop either outside or in an area where you can’t do much damage with the dye.
Step Two: Prepare the dye
Follow the instructions on your dye packet. In our case, we had to mix it with several litres of very hot water and a quarter cup of salt until dissolved.
Step Three: Prepare the shoes
Remove the laces from each shoe and set aside. Then take a generous dollop of Vaseline and cover the rubber edge of the sole on each shoe to protect it from the dye.

Step Four: Dip, dip, dip
With your rubber gloves on, dip the shoes in the dye toe-first until they are submerged just below the lace line (about half way). Hold there for a few moments.
Step Five: Ombré!
Using your cloth or rag, slowly wipe the shoes back from the toe toward the heel to blend the colour along the back half of each shoe. You may need to dip your cloth into the dye to intensify the colour, or dip it into a dish of plain water to lighten it—depends on the outcome you are going for.

Step Six: Double dip
When the colour has been blended from toe to heel (and from darker to lighter), hold the shoes by the heels and dip the very end of the toe back into the dye to intensify the colour at the very tip of the toe.
Step Seven: Rock em’
Allow shoes to dry overnight, replace laces, and prepare for compliments!

Ali Maldoff is a writer covering all things DIY, lifestyle, and food/drink on her blog Mint Sprinkles. Each week she gives us a different cool and easy project that we can try at home. We love Ali’s taste!

