I had a lot to do today. Groceries, invoices, plus the bathroom needed a serious scrub. So naturally I decided to make a candle.
I’ve always wanted to do this, because I tend to go through a lot of candles. I love to light it, admire it, and then go out, ignoring the safety of my entire household, and let it burn, just like the Usher song. Because of this, I’m always in the market for new candles, despite the fact that my budget can’t always support this pattern.
Designer votive (which is just a nice word for scented) candles aren’t cheap. I remember getting a candle from a boyfriend for the holidays, and only this candle. Trying hard not to appear ungrateful (as I melodramatically pointed to the stack of ten presents that I had wrapped for him) I asked why I got a candle. He explained that it was an $85 dollar candle made of premium wax and perfumed with the most elite essential oils. It smelled like freshly baked cookies. We broke up in the new year.
To my surprise, getting the equipment and ingredients was the most difficult part of making my own candle. The actually candle making was a breeze.
I wanted soy wax flakes, not regular wax flakes, because I’m fancy. Then, it was tough to decide what type of oil I wanted to use for the fragrance. The Mason jar was easy to find, I got it at Value Village for .89 cents, and the wicks were available at a local craft store. The wooden sticks were snapped up at the dollar store, along with a humorously big chocolate bar, but that wasn’t for the candle project.
If you have a few hours, or are avoiding some mundane tasks that seriously need doing, but feel that watching Netflix is not a good enough use of your time, here are 8 simple steps to creating your own candle:
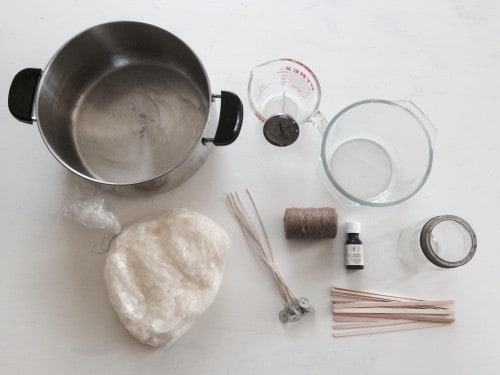
1. Collect What You’ll Need
– wax flakes
– wicks
– a container to hold the candle (a jam or Mason jar works, but a cleaned out soup can looks really cool, too)
– long wooden sticks
– a large pot
– a glass dish
– a cooking thermometer
– a measuring cup
– an essential oil (it must be a pure essential oil with no added ingredients; additives can be flammable when the candle is burned)
– some twine
– adhesive labels
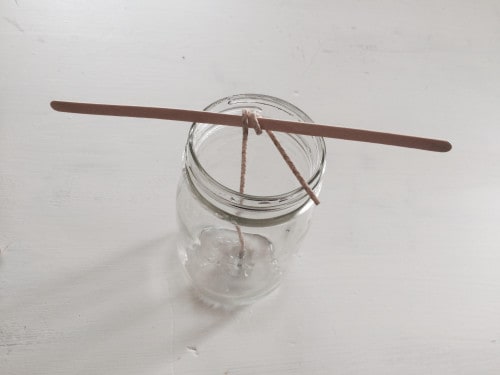
2. Insert the Wick
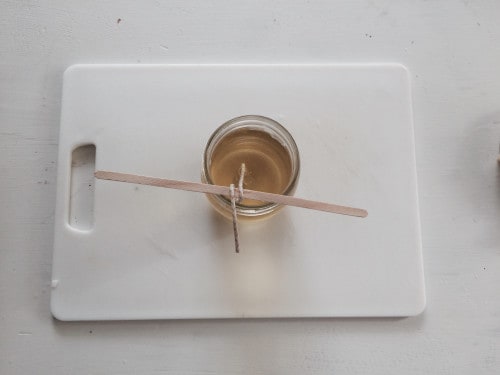
Place the flat metal tab at the bottom of your container, as close to the center as possible. Take a long wooden stick, and balance it across the mouth of your container, wrapping the excess wick around it to hold the wick in place. If you’d like, fasten the stick to the rim of the container with masking tape to make sure it won’t wiggle around if the container is moved.
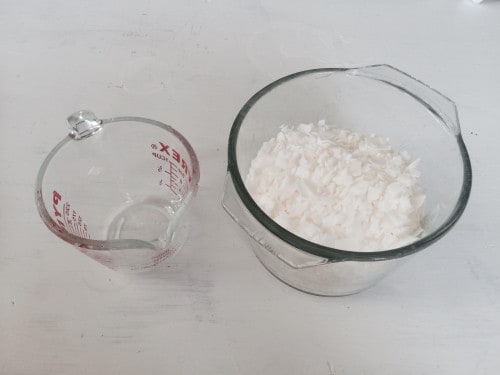
3. Measure The Wax
If your container holds one cup of wax flakes, double that (two cups of wax flakes) and set it aside into the glass dish.
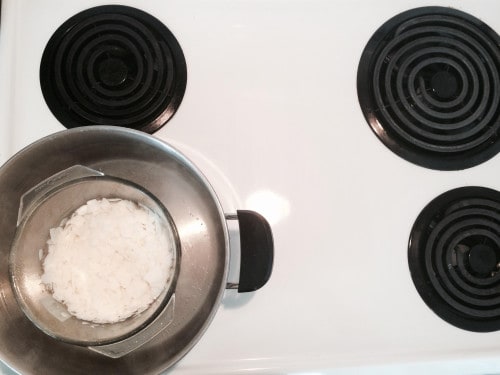
4. Heat The Wax
Fill a large pot half way with water and place it on the stove. Place your smaller glass dish, which is filled with wax, into the large pot. Bring the pot to a boil, making sure that the water isn’t boiling over into the dish. Depending on how much wax you’re using, this can take anywhere from five to fifteen minutes to melt. Keep checking on the wax, stirring it occasionally with a metal spoon.
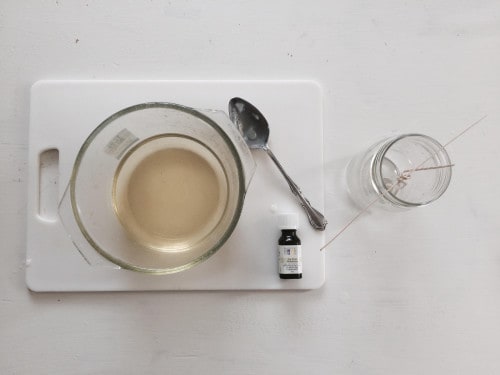
5. Add Your Scent
Once the wax is fully melted, remove it from the pot and prepare to add scent. I opted to use tea-tree oil for this candle. (It’s not just for zits!) Tea tree oil is said to clear the nasal passages gently, and the diffused fragrance also helps with headaches and stress. Because my jar holds two cups, I used three drops per cup, so six drops in total. You don’t want to add too much oil because it will prevent the wax from hardening properly.
6. Pour Your Wax and Let it Set
Pour the hot wax into the container, but be careful not to move the wick. Wipe any excess drips away. Let the hot wax sit for about three hours at room temperature to solidify.
7. Trim The Wick
Cut the wick so that it doesn’t protrude from the top of the container. Keeping the flame contained is very important. You want to make sure the candle won’t burn your house down, like that time you left the Dr. Oetker’s in the oven overnight.
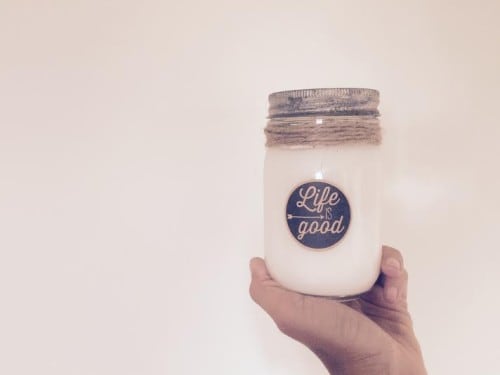
8. Enjoy Your Candle
Make a fun label, decorate the jar with twine, or something else that’s so sickeningly twee, or just leave your jar blank. Wait a day, and then light the candle, watch the flame, meditate, chant a bit, whatever, and then, with a rejuvenated sense of self, finally tackle that to-do list.