30 minutes / easy / $10
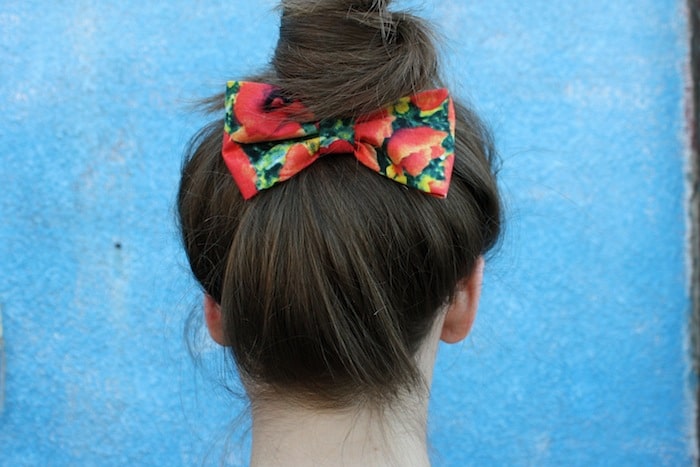
Take your look to the next level with this easy and super cute hair bow clip tutorial—no sewing machine required! You’ll make these clips in super small, extra large and everywhere in between because ‘once you get bowin’ you just keep goin’!

Supplies:
-
Fabric
-
Scissors
-
Needle & thread
-
Glue gun
- Metal hair clips


Steps:
- Cut a rectangular strip out of your fabric; for a large bow approximately 4 x 8 in., for a medium bow approximately 3 x 6 in., and for a miniature bow approx 2 x 4 in.
- You will also want to cut out a mini rectangle – this will be the centre of your bow.
- Lay your rectangle fabric-side down. Lengthwise, fold one edge of the fabric in towards the centre. Fold the other side in so that the two meet in the middle.
- Take the short ends of the rectangle and fold them in so they meet in the middle – make sure they overlap slightly.
- Thread your needle and create a stitch at the edge of your mini rectangle. Pinch the bow in the middle – creating an accordion style fold. Continue to stitch along the centre of the bow until you reach the other end. Tie your thread and cut off the excess.
- Using your glue gun, place a small dab of glue on the back of the bow in the centre of the stitched ruffle. Place your metal hair clip down and hold in place for a few seconds. Open the metal clasp, and put another dab of glue on the inner metal facing closest to the bow.
- Quickly fold your small rectangle in on itself – the same way you did in step 3 – and place it on the glue (fold side in). Continue to wrap the fabric strip around the bow and, using another dab of glue on the inside of the metal hair clip, secure the strip (cutting off any excess fabric).


